Thursday, 31 July 2014

"Lists" Tab - First Section - Groceries

Welcome back! As you can see today we are delving into the biggest section of my Filofax, the "lists" tab. I have split it into 6 sections using the 1-6 dividers that came with the Filofax, but I am going to redesign these once I have the elusive laminator.

Tab 1 will be titled "Groceries", and as predicted, contains m weekly grocery and household shopping lists and my meal plans. When I upgrade to an A5 I am probably going to link these into the daily pages, but we will see...


This is my tentative colour coding, but as I have just got a set of Steadtler Triplus Fineliners this will more than likely change.

Here is this week's working shopping list:


As you can see, it's a bit chaotic with all the highlighting! A work in progress I would say.

Here's a basic meal plan - the colour coding here is for the different Slimming World days but again will likely change:


As you can see I've moved things around already! And as Asda were out of the Nando's rub, things will change again... You can see that I do not decorate my shopping lists or meal plans as they are temporary pages.

Not a very interesting section but an essential one! Next post is predictably enough Section 2 - Books!

Have a lovely evening!!

Emma x

Wednesday, 30 July 2014

Inside my Filofax - Diary Tab


Hi again! As promised, this post is to feature the diary/calendar section of my Filofax. We open with a beautiful divider created by the lovely Sarah (link in previous post):


You will see poking out from behind the A-Z tabs from the original inserts. Once I have my laminator I will change this to a year overview and the 12 months of the year, which is how I have split them at present. I don't have a year to view insert yet though - that's next on my list of inserts to find/create!

Each monthly section opens with the month-to-view I created on Excel:

As you can see, this is quite a simple layout - I have used thin washi along the bottom and will change this month on month. The pink pen indicates important dates, purple is for birthdays/anniversaries etc and the blue is for holidays/paydays.

After this, I currently have the WO2P inserts from the Filofax, which I am using to plot events and important dates in advance, as the daily inserts take up a lot of room and I can only have a few weeks in the planner at a time. As they are only printouts, I bin them once they are more than a week old, as they are more To Do lists then journals.

And here they are:

 I'm not sure if these are the ones that I will continue using, but they have done the job so far - I may make the To Do and Must Do one section, but the Today tab I use for appointments/events, and the box underneath is for random notes. I do not decorate these as I see them as temporary, but I do the weekly sheets.

For my page marker, I use the original flyleaf, with a Martha Stewart paint chip card I got in the US a few years ago with a Martha Stewart tab. The sticky notes are just some cheap ones I peeled off a sheet of them. The clip is a magnetic bookmark my sister bought from Amazon:


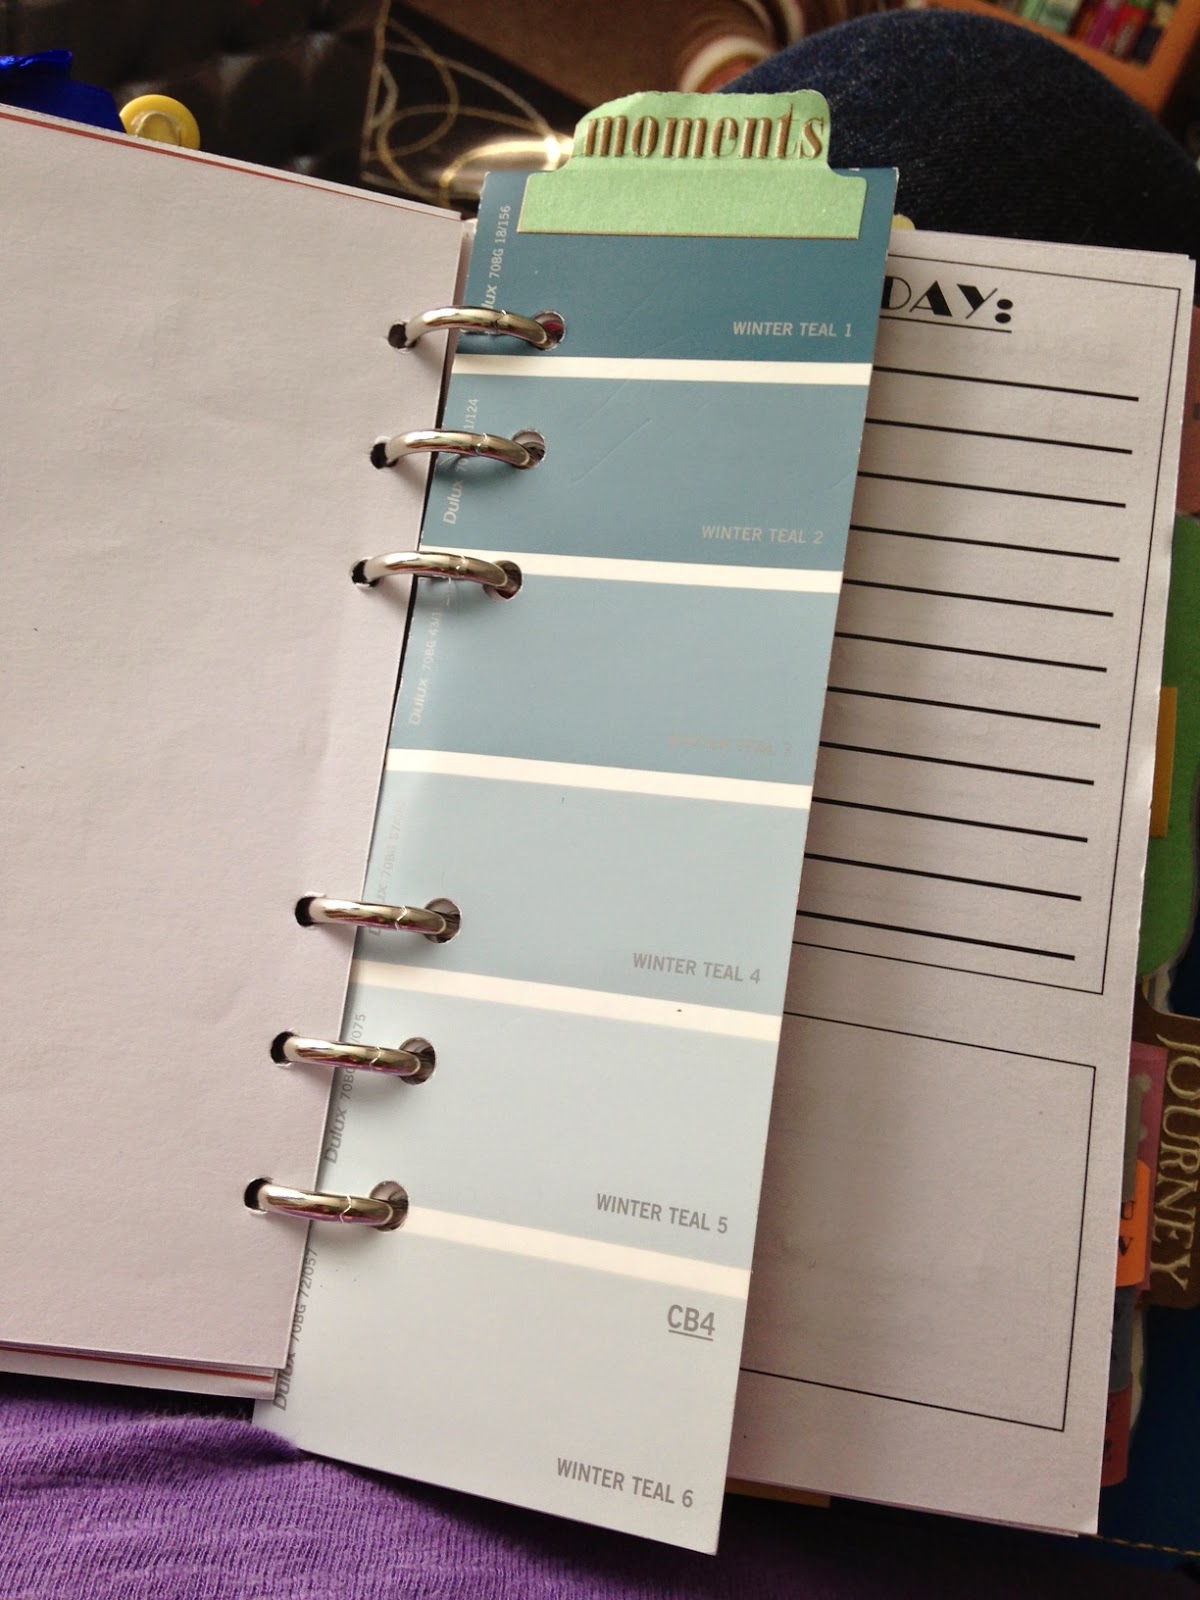
The last photo for this LONG post is of a bookmark I created from a Dulux paint chart and an old scrapbook sticker for the tab. Again I am going to laminate once the machine arrives:


And that is my diary/calendar section. As I mentioned above, I think that this is more of a temporary set-up at the moment. I am getting used to what works for me so that in 2015 I can start afresh. Sorry that this section is so long - next post will be about my Lists tab.

Thanks again for reading!
Emma x

Tuesday, 29 July 2014

Inside my Filofax - the dashboard!

Okay, so for all you other newbies out there, the "dashboard" is essentially the cover of your Filofax as soon as you open the front. The inside of my Apex looks like this:


As you can see, this Filofax only has one credit card slot on the inside fascia, and I have added some quirky paperclips - it keeps them close at hand in case I need one on the go, and I think it looks good! I always need to have Airmail stickers, so decided to make use of the clips too.

I LOVE my dashboard, but I cannot lay claim to its gorgeousness. My Instagram friend @filofabulouss (Sarah as she is known in the outside world!) created it with the main side tabs and the button and bow clips you can see poking out of the top. If you want some hep to get set up, I would recommend visiting her etsy shop: www.etsy.com/uk/shop/papercutscraftsx


As you can see, my planner is QUITE bulky already - the "LISTS" tab that is poking out is another of Sarah's creations. The A-Z tabs are going to be repurposed as months for my diary - just waiting on the delivery of a laminator and I will try that out. The cute pen is a Paperchase cheap rollerball, but I am awaiting delivery of some fineliners that will allow me to start colourcoding.

That is the basic introduction of the inside of my Filofax. Next post will show how I am using the diary inserts it came with and the ones I have created for my own use. Thanks for reading, and please do comment below!

Welcome to my Filofax

Okay, so my title really says it all. I am Emma, and I am new to the "new" world of Filofax and planners out there today. I have used Filofaxes on and off for years, but haven't touched one for ages until I discovered what everyone was doing on Instagram under the hashtags "filofax" and "plannernerd", and the yearn to create as I did with scrapbooks years ago took over and off to eBay I went.

I was actually really lucky - after missing out on one or two personal size Filofax on there, I managed to pick up a brand new blue and yellow Apex for only £11 including postage, with most of the original inserts and a full 2014 diary.

As you can see, she is already filling up quite nicely and I have only had her ten days! I must warn you, this hobby can become an addiction!! In my next few posts, I will show you how I am using her, what inserts I have and the tool kit I have accumulated over the last couple of weeks. Please feel free to post any questions in the comments, and if there is anything in particular that you would like me to include or show! Thanks for reading, and hope you will be back soon!

Emma x